Learn how to implement TallyPrime POST API to Integrate and Import Data to TallyPrime Programmatically
TallyPrime API Integration mainly requires 2 parties as below;
- Third-party Software Developer
- TallyPrime User
2. Quick Integration Steps
Basically our TallyPrime API Integration works in 3 simple steps as explained below;
Step 1: Implement our TallyPrime API POST URL + Headers + JSON Body in your application from where you would like to send the data
Step 2: Load our TallyPrimeAPI.tcp file and E2T-API-Manager.exe in your Tally in which you would like to received the data
Step 3: Either you define schedule to import data automatically or sync manually as and when required
That’s it, by implementing TallyPrime API data from third-party applications and ERP’s will be imported seamlessly.
In this section you will get step by step understanding of how to implement TallyPrime API
3. Steps to be performed by Third-party Developers
1. Visit our website https://tallyprimeapi.com and create your free trial account
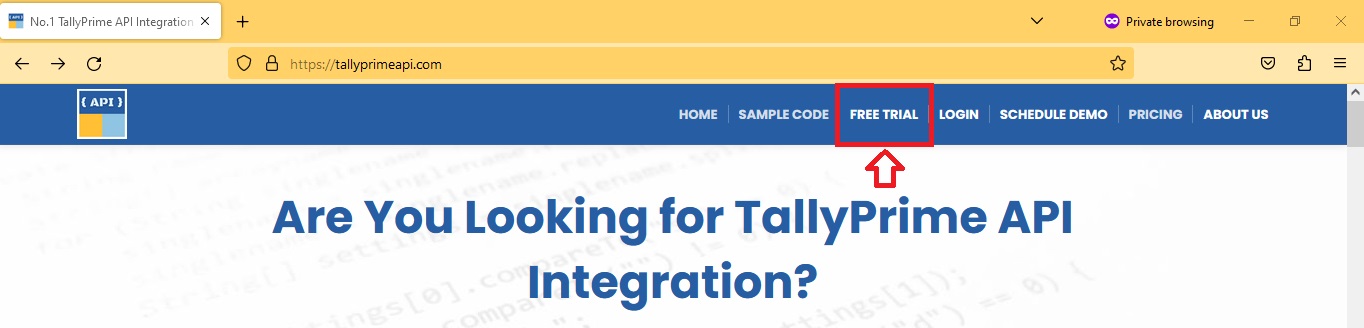

2. Once you are done with the signup, login to your account and you will be redirected to your Dashboard area where you will find API for all Tally Masters and Voucher type

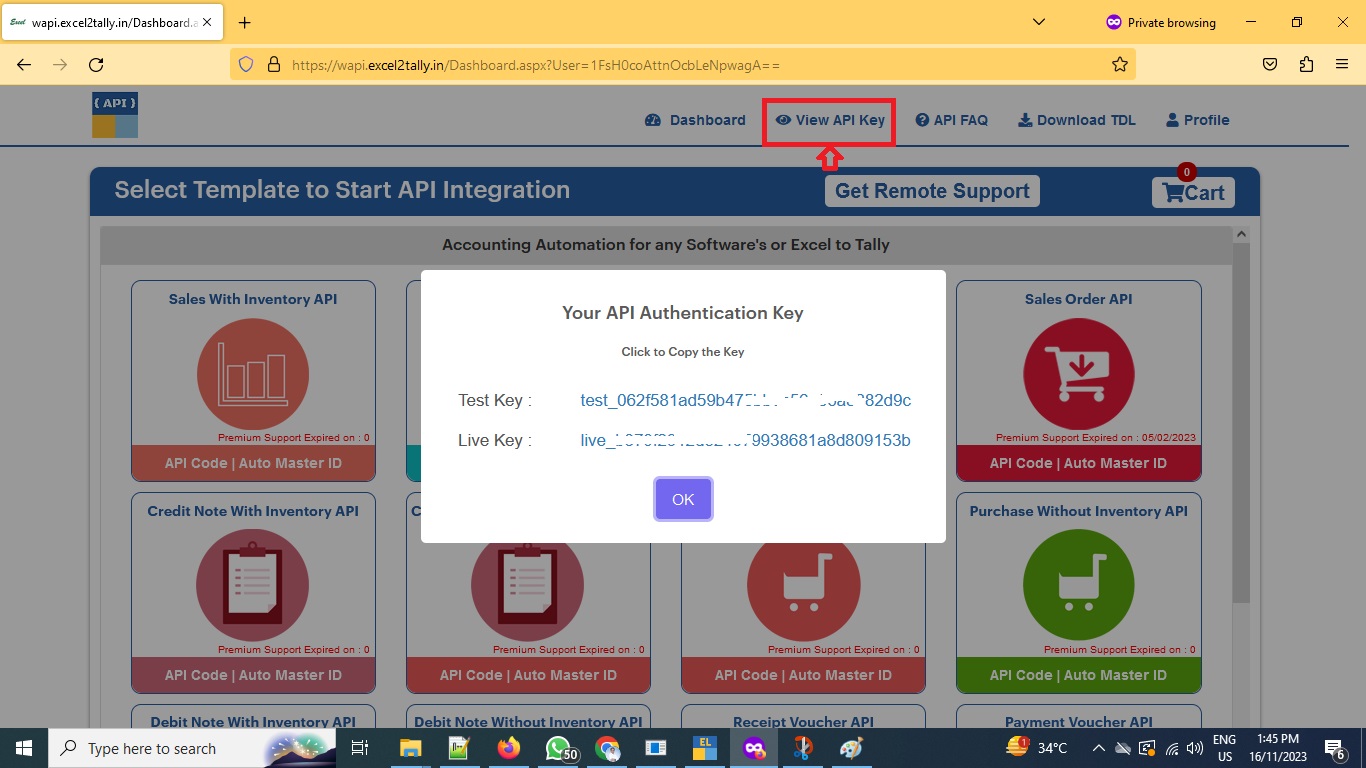
3. Click on View API Key option to get your unique Test Key and Live Key as shown in below snapshot.
Test Key :
You can use Test Key to perform tests by sending data from your application to TallyPrime. In Test Key you are allowed to send upto 450 records after which you will get the response message as “Your Free Limit is Exceeded”
Live Key :
Using live key you can send unlimited data from your application to TallyPrime. Validity of the Live key is subject to the subscription you have opted
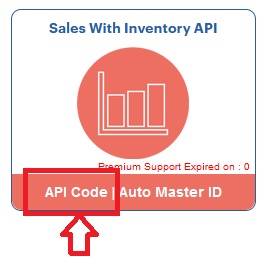
4. Third-party software developers can now click on view API Code for any template that you wish to integrate in your application/ERP.
On the next screen you will get complete details of;
- API URL on which you need to send the data
- Header
- JSON Body
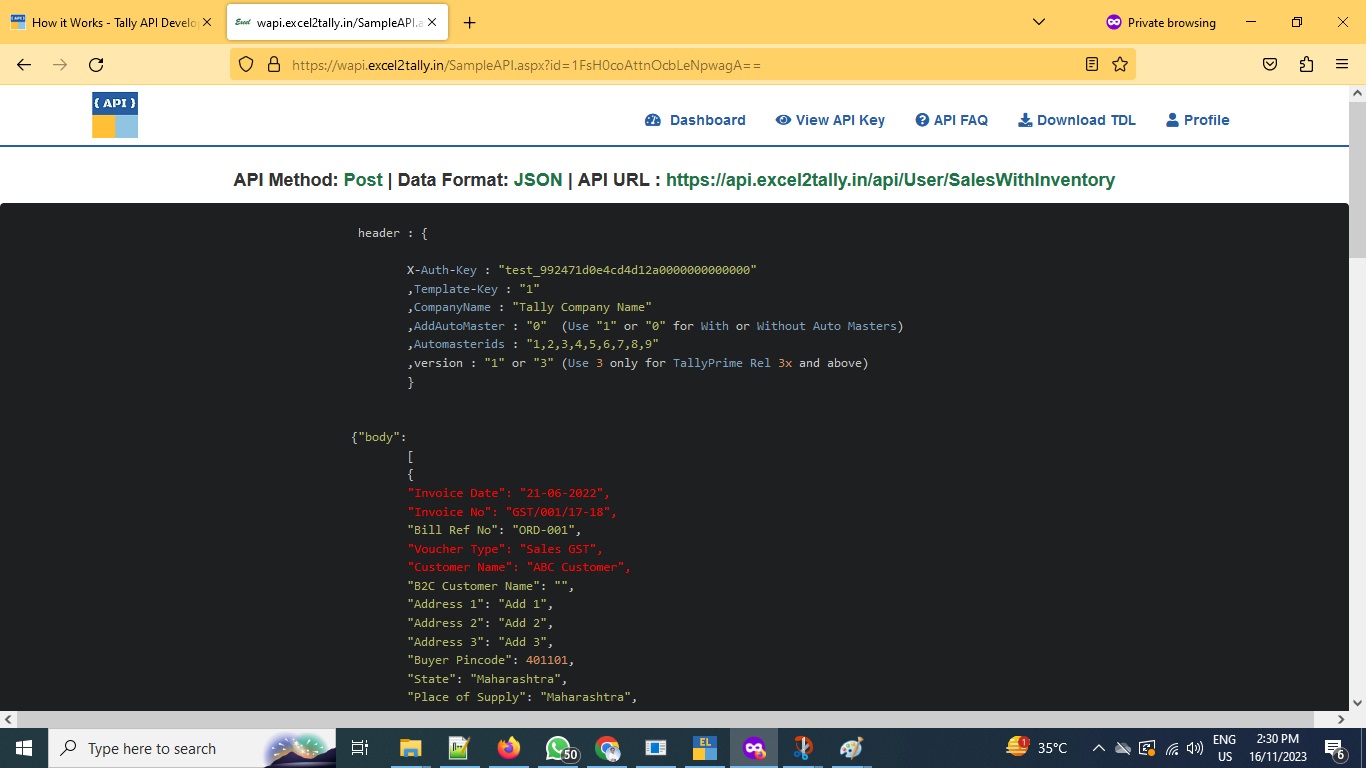
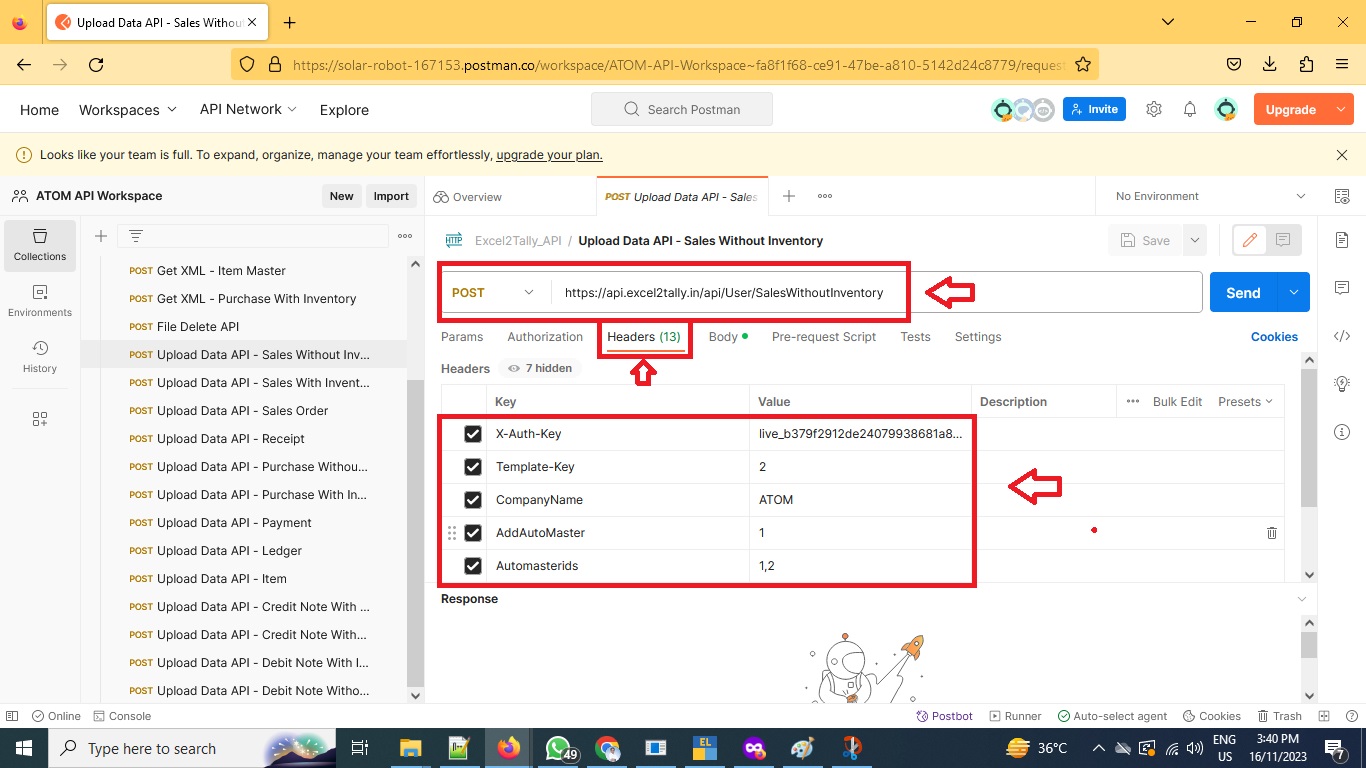
- X-Auth-Key : This will be your Test or Live Key as explained in above section
- Template-Key : This will be the template key belongs to each template type. This identifies the type of data you are sending to TallyPrime whether it is sales, purchase, receipt, payment, etc
- CompanyName : This will be the Company Name that have been assigned in Tally API Settings. It helps to sync data with right company, if you make mistake here your data will be not imported to the TallyPrime
- AddAutoMaster : Use “1” if you want to auto generate the masters along with the data you have sent or Use “0” if you have already created required masters in Tally and want to just send the vouchers. For example, you want to auto generate customer masters, item masters, voucher type etc then set “1”
- Automasterids : If you wish to auto generate the masters along with data then you need to specify which type of master to be auto generated from 1 to 9. Each templates are having more or less ID’s depending upon it’s nature. We have already given list of ID’s and it’s purpose for each templates as shown below;
- Version : Depending upon the Tally version you are using, you will have to define “1” or “3”, here “1” belongs to any Tally version lower then TallyPrime Rel 3.x and “3” belongs to Tally version higher then TallyPrime Rel 3x
- Body
- Body contains your actual data that you wish to import in Tally. Each templates are having it’s different body structure. It is important for you to follow the body fields and it’s value carefully to avoid errors while sending data to API server.
- Fields highlighted in the red are compulsory and can not be left blank where as fields in green are optional and you can left them blank

4. API Testing via POSTMAN
We recommend you use Postman application to perform your testing to check the end to end data flow.
Headers
Body & Response
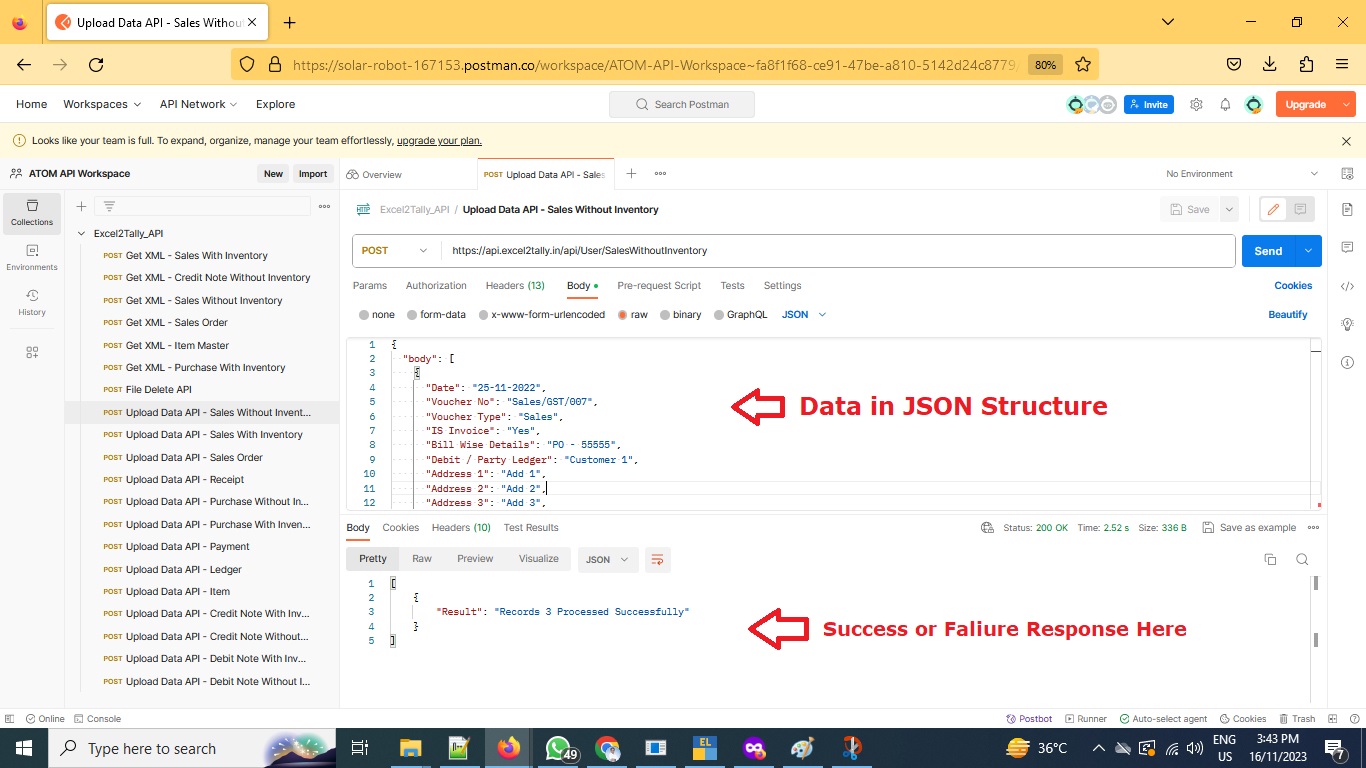
Above example indicates, 3 records are submitted successfully to the TallyPrime API server and is now ready to import in TallyPrime Data.
5. Steps to be performed by TallyPrime User
Follow the steps below to be configured in TallyPrime to begin importing the data from API Server;
1. Download Tally TDL from your Dashboard

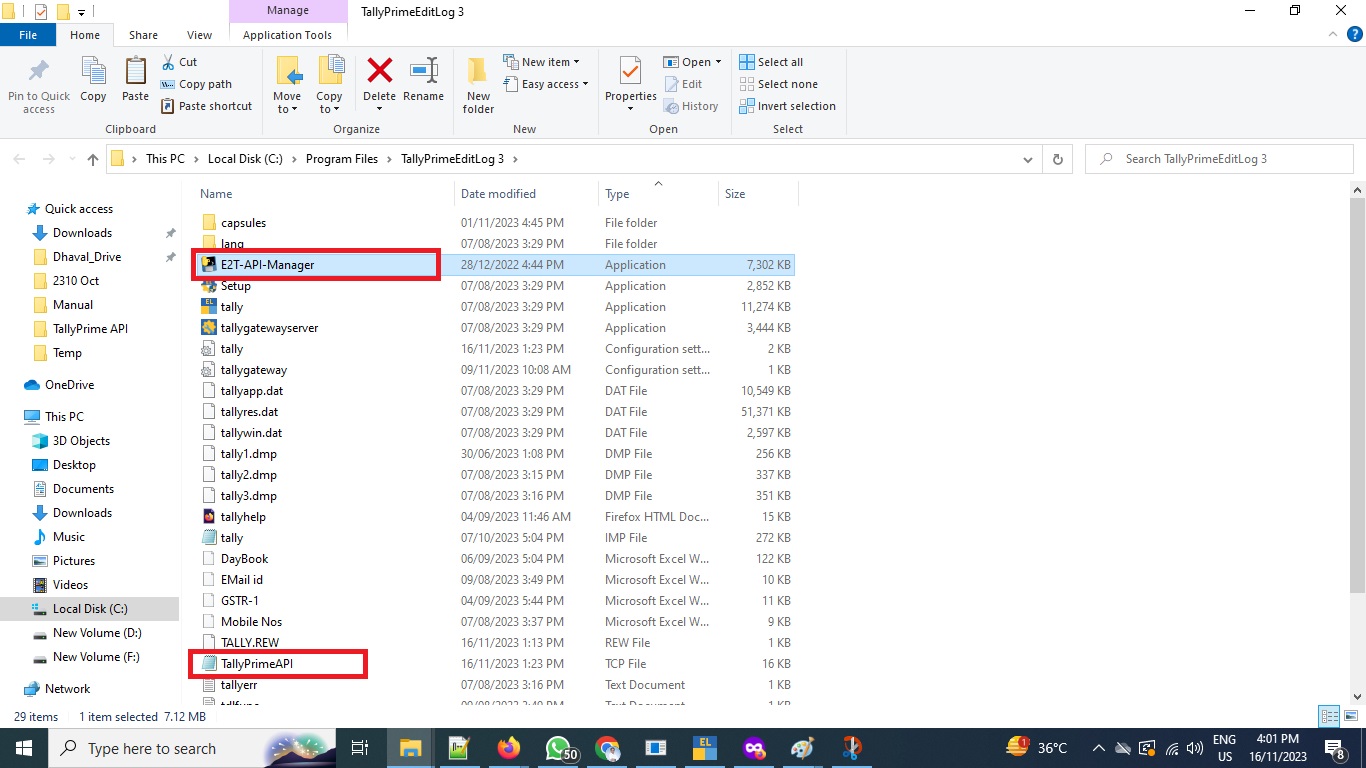
2. Copy TallyPrimeAPI.tcp and E2T-API-Manager.exe files in your TallyPrime folder
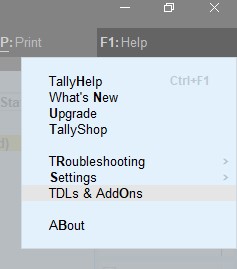
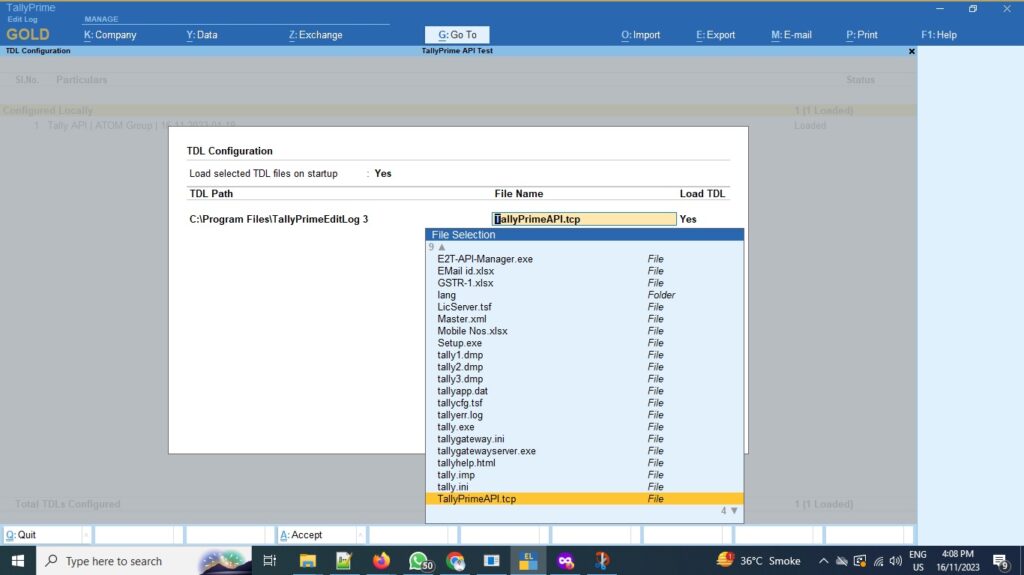
3. Open TallyPrime > Press F1: Help > TDLs & Add-ons > Press F4: Manage Local TDLs to load the TallyPrimeAPI.tcp file and Press F6: Add-on Features to Activate the API Module as shown in below snapshots;

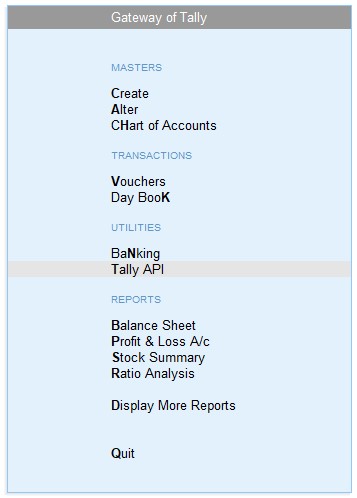
Once you activate the module, you will find new menu on Gateway of Tally under utilities as Tally API

3. Go to API Settings and paste the Test or Live Auth Key you got from the Dashboard as explained in above section and Company Name or Short Name that will be used by your Third-party software developer


4. Go to API Template to sync data manually from the API Server;
As soon as you hit enter on any of these templates, it will start syncing data with API server. It is recommended to check the error log after each import to check whether any errors encountered or not during data import, check Tally.imp file found under the TallyPrime folder.
If you notice any errors in the Tally.imp then you are advised to take help from your accounts team to understand the error and get it resolved for the error free import of current or future data.
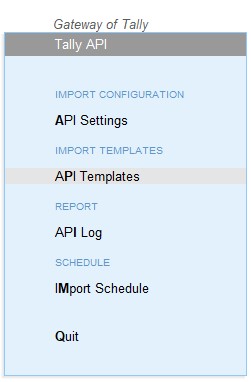
5. API Log : This will display the API data import log summary
6. Import Schedule
Use schedule option if you wish to auto import the data via third-party application without any user intervention or manual data import tasks.
You can define up-to 3 schedules for each template types in each company. It is mandatory to keep TallyPrime application and Data open in which data to be imported automatically. Ideally you should set this scheduler on designated server computer to avoid interruptions.

You may refer our Sample Code download section to kick start your integration with our pre-built sample codes for PHP, Java and Python based applications.
If you still face any difficulties in following above guided steps, you may reach us on +91 7710010373 from Monday to Saturday 10:00AM to 6:00PM
During the support call our executive will ask you to explain the steps you have performed and where exactly you have stuck during the process.
